Keyboards are like a magnetic repository for everything that crosses over them, including all of your lovely skin cells, dust accumulations, germs, and food crumbs. And If you have cats and/or dogs, their hair will always find a way to nestle comfortably between the keys.
Fortunately, there are a lot of ways to get that gunk out, before it accumulates enough to make certain keys more or less uncooperative. It tends to be worse if you have a mechanical keyboard since there is so much space around and underneath each key—more than enough room for anything and everything to settle and accumulate.
If you’re a freelance writer, coder, gamer, or journalist (more occupations than we can list here), your keyboard is the lifeblood of what you do for a living or for fun.
Keeping it clean and running smoothly is imperative but is it worth investing in some type of specialized keyboard cleaner?
Table of Contents
Is a Keyboard Cleaner Worth It?
A good keyboard cleaner is worth it. A good keyboard cleaner will make the job of ridding your keyboard of dust, dirt, oils, and germs much easier. Cleaning your keyboard on a routine basis will not only save you from the headache of sticking keys or keys that won’t depress, but it will also extend the lifespan of your keyboard and make it far less likely to give you a stomach bug.
Everybody wants to get their money’s worth, especially if you drop a pile of cash on a premium, mechanical keyboard. It’s no more exciting a task than vacuuming the living room but funnily enough, vacuuming your living room will help you knock down the level of floating stuff that makes its way over to your keyboard.
It’s important to keep your keyboard clean, so you don’t end up with stuck keys and something potentially worse.
Do you really want your morning Bear Claw pastry crumbs to stay between the J and K keys forever?
And If that’s not enough to inspire you to get cleaning, consider that a dirty keyboard contains around 60 times more bacteria than a toilet seat.
Types of Keyboard Cleaners
There is no one-size-fits-all approach to cleaning your keyboard. There are many ways to go about doing it. Some people like blowing it out with their mouths and while that may be more fun than compressed gas, it’s not as effective.
Vacuums
Keyboard vacuums are really nice. They’re small and compact, so you can keep them right there at your desk or in your desk drawer, ready whenever you are to suck out some keyboard debris.
They’re versatile, small, decently powerful, and very affordable. They even have cute ones like this discoGoods Battery Operated Desktop Vacuum Cleaner. Who wouldn’t want that? They have a lot of different versions too, in case pink annoyed emojis aren’t your style. The best part is, it’s only $13.
There are plenty of traditional keyboard vacuums as well if you’re looking for something a little stronger that comes with multiple attachments.
Honlibey’s Cordless Vacuum comes with several attachments and has excellent suction.
If you really want something that will thoroughly clean your keyboard, with enough power to suck your socks off, go for the DataVac ED500. It’ll cost you a pretty penny but you won’t have to worry about debris making a home between your keyboard’s keys.
Gel
Who would’ve thought you could use something that’s high on every kid’s list, especially if they live in a home with carpets—gel? This biodegradable gunk is a wonderful stress reliever and it’s really cool to use. It will bring the kid out in you again while cleaning your keyboard.
A good quality gel won’t leave any residue and is brilliant at catching dust, crumbles, hair, and other debris.
The only thing with gel is that it won’t clean grease or stains.
You use it in place of cloth, rubbing it back and forth over your keys and pressing it in occasionally for some of the deeper gunk. You should unplug or turn off your keyboard first unless you want your computer going haywire while you work.
The most popular product is Super Clean Gel, which comes with a number of cleaning instruments to go with it.
Compressed Gas
This stuff has probably been around the longest and it earned all of that longevity because it works. Some people don’t like it simply because it’s compressed air, after all, and whatever it blows out from in between the keys may end up halfway across the room if you’re not careful.
If you’ve ever worked in an office environment, you should be very familiar with compressed gas cans. Offices usually stock these things up like they do after-hours employee phone call lists. Falcon Dust-Off Electronic Compressed Gas Dusters are the most popular.
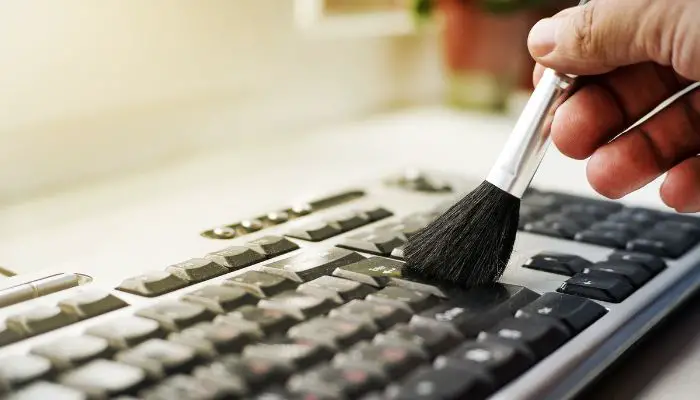
Brushes and Wipes
Almost all of the above-listed cleaning devices come with either a brush or a cloth—sometimes both. These products are exactly as advertised. If you have a mechanical keyboard, be sure to note the length of the bristles before grabbing a brush.
Some keys have a lot of depth between them and you want those bristles to reach. The best part about brushes is that they are a dime a dozen and affordable, while the cloth should be microfiber and affordable as well.
Keyboard Cleaning Kits
You will find all kinds of cleaning kits designed for keyboards out there. So it depends on your own preferences. Some come with vacuums or blowers, along with a range of brushes, tweezers, cleaning cloth, and more.
This Joint Stars Air Duster comes with an entire kit of different devices and you will find that most kits are like that, with a little bit of everything listed above.
The Sin Shine 7-in-1 Electronic Cleaning Kit is a nice option as well, especially if you prefer a little organization with your cleaning.
Related Article: Do Mechanical Keyboards Get Better With Time? (Not How You Think)
Which Keyboard Cleaner Is Most Effective?
To keep your keyboard clean, chances are you will find it most effective to use a variety of keyboard cleaners. For a light clean every week or so, you might use cleaning gel or sticky tape to lift all the dust and debris from on and around the keycaps. You might then use a can of compressed air to blow out particles from under the keys, a cotton bud with a little disinfectant on it to clean between the keycaps, and finally, a disinfectant wipe or 2 to clean the surface of the keyboard and tops of the keycaps.
According to many, the most effective stand-alone keyboard cleaner is gel. But honestly, the most effective keyboard cleaner is the one that cleans your keyboard the best. The gel might be fantastic for silicone keyboards but it’s not going to get the kind of deep penetration needed for mechanical keyboards.
Mechanical keyboards and other keyboards with deep recesses between the keys need vacuuming or blowing power applied to them, with a good microfiber cloth to clean up after. Or you can opt for the gel if you don’t like microfiber. Plus, it’s fun to fidget with when you’re bored.
It’s also a good idea to get a microfiber liner for when your keyboard and computer are not in use. It will seriously cut down on the amount of time you spend trying to blow or vacuum the dust out from between the keys.
There are a ton of keyboards out there. Some are small. Some are gigantic. Some keyboards have very deep keys while others are really shallow. Just one suggestion about the best combination of cleaning materials may be perfect for 20% of all the keyboards out there and useless for the remaining 80%.
In other words, it’s a good idea to pick up several cleaning tools or a cleaning kit that’s best for your particular keyboard. It’s hard to go wrong when you know what you have and what you’re looking at.
How To Clean Your Keyboard With Different Cleaners
Since there are several “above methods,” we’ll cover the best ones. The last thing you want to do is ruin your keyboard by dumping a microfiber cloth saturated with isopropyl alcohol on it.
No matter what method you use, completely unplug and detach your keyboard from your computer and turn it off (if the latter is applicable).
If you’re not taking off the keycaps, it’s a good idea to turn your keyboard upside down and give it a gentle shake before you start cleaning. This will help to loosen any particles from beneath the keycaps.
Vacuum
Most keyboard vacuums have bristles on the suction tube to help loosen up all that debris between the keys. Manipulate the vacuum bristles between every key on your keyboard. Be patient. Take your time and do a thorough job.
Compressed Gas
Use controlled bursts of air while sweeping the compressed gas canister back and forth, pointed between the keys, and held at a 45° angle. Make sure you use the little straw nozzle.
Cloth and Q-Tip
Make sure that either the cloth or the Q-tip is very, very lightly covered in isopropyl alcohol. Work your way between the key with the Q-tip, changing tips when necessary. Follow it with the cloth, lightly wiping the oil and dust from the keys.
Cleaning Gel
You do the same thing with the gel, lightly wiping down the keyboard surface. You can press in where necessary or lay the gel across the keyboard and leave it for a few. The gel will sink in between the spaces and you can peel it back up later.
A Deeper Clean For Mechanical Keyboards
Every now and then your keyboard will have accumulated too much grime for a quick clean to be effective. In this case, you’ll want to pull off all the caps with a good keycap puller (wire ones are usually the best) and place them in a sudsy bowl with lukewarm water and a dash of washing-up liquid.
Give the keys a good swish around, scrub any grime off them, and leave them to soak for about 15 minutes.
While the keycaps soak, use tweezers to pull out any hairs that might be tangled in the switches.
Next, use a can of compressed air to blast out any remaining particles.
After about 15 or 20 minutes, rinse the keycaps, dry them off fully with a towel and reassemble your keyboard.
Make sure the keycaps are bone dry before you put them back on.
For easy reassembly, you might want to take a picture of your keyboard before you pull the keycaps off.
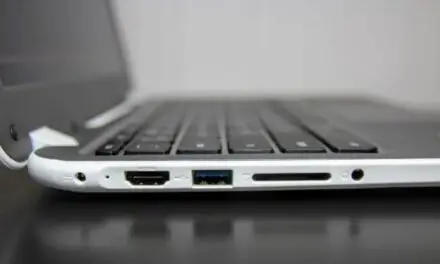
Cleaning A Laptop Keyboard
To clean your laptop’s keyboard you’ll need some cleaning gel or sticky tape, disinfectant wipes, and a can of compressed air.
First, turn your laptop off and unplug any cables from it.
Next, turn it upside down and give it a gentle shake to loosen and knock out as much debris as possible.
Stand the laptop on its side and use the can of compressed air to blow out any more hard-to-reach particles.
Stand the laptop the right way up and gently press the cleaning gel onto and around the keys so that as much dirt and dust as possible will stick to them. If you don’t have cleaning gel, you could use a cotton earbud dampened with rubbing alcohol to clean between the keys.
Next used disinfectant wipes to clean the surface of the laptop and the tops of the keys. You don’t want your laptop to get too wet, so if the wipes contain a lot of liquid you may want to ring them out a bit first.
Laptop keys usually aren’t too deep so the wipe should be able to get in between the keys and the sides of the keys. If it’s difficult, use a cotton bud with a little disinfectant.
Finally use a lint-free cloth to dry off your keyboard. Make sure it is completely dry before you turn it on or plug it back in.
How Often Should You Clean Your Keyboard?
You should clean the surface of your keyboard once a week at the very least. You don’t have to subject it to a deep and thorough cleaning every time, however. Do your deep cleaning once every two weeks but you should wipe it down daily.
Depending on usage, a deeper clean is recommended for your keyboard every 1 to 2 months to remove oil and get everything out from between the keycaps.
Of course, it depends on where your keyboard is located and how quickly dirt and debris accumulate on it as well.
What Happens If You Don’t Clean Your Keyboard?
If you could look at your keyboard under a microscope, you would be horrified. They are covered in bacteria and there are often some nasty ones in there as well that have the potential to upset your stomach.
Dermatologists have studied keyboards for years and nearly every study has found E.Coli on nearly every keyboard involved in the study. You get two guesses where E. Coli comes from inside the home, most of the time, and the first one doesn’t count.
A lot of that nastiness can transfer to you and you are far more important than the negative consequences for your keyboard. The keys will begin to stick, the inputs won’t work as well, and enough accumulation of gunk will harm the underlying hardware.
None of that will matter if you’re in the ER getting dosed up with super antibiotics because a cut in your finger was infected from your keyboard.
What To Never Clean Your Keyboard With
You should never clean your keyboard with any kind of cloth or another cleaning instrument that is saturated with alcohol or water. There’s a reason keyboards don’t come with IP water-resistant ratings.
When a keyboard gets saturated it can leave behind moisture and minerals that can cause corrosion, interfering with circuits and preventing your keyboard from working properly. And if the hardware doesn’t completely dry out before it gets plugged back in it could short circuit and fry internal components.
If you want to turn your keyboard into a collector’s item on your electronics display or a really weird-shaped paperweight, clean it with a wet, soapy rag. The water or the excess alcohol will find its way down underneath the keys, where all of the exposed hardware is located.
If that happens, your keys might stop functioning one at a time or all together and they may or may not return to working condition once it dries. It’s probably best not to risk it at all. Isopropyl alcohol (rubbing alcohol) may dry up pretty quickly but that doesn’t mean it won’t cause damage beforehand.
If you happen to have your keyboard plugged in, well, electricity gets funny when liquids are involved. You should always unplug your keyboard when you clean it, even if it’s just a wipe-down. And never saturate your cloth. Always stick with a lightly damp cloth and nothing more.
Instead of a sopping rag, use a little isopropyl alcohol or another electric-safe cleaner that will dry out quickly and not leave behind any traces.


